How to setup Allen&Heath CQ-18T mixer, connect to a computer and start recording in a DAW
- racsaimatyas
- Jan 3, 2024
- 4 min read
Updated: Feb 18
So I have a client who came to me for help. Their band bought an Allen&Heath mixer, the CQ-18T one, and they couldn't figure out how to record their music with it. And I can't blame them.
I wanted to help them but I couldn't find any useful material online regarding the absolute basics. Everything was discussed in the articles I found, just not the basics. Or I'm just too stupid but let's not go there. Anyway, I decided to share my findings because after 5 hours of research, trial and error, I was able to make it work. So if you're facing the same problem as they did, I hope these next few guidelines will help you (this is my very first blog post, so it might not even find anyone, but here's hoping I can help at least one person).
So first things first:
Make sure you have downloaded all necessary resources from the official website. You can find them here: https://www.allen-heath.com/hardware/cq/cq-18t/resources/ The user guide helps, I couldn't figure out what to do with the firmware (the mixer was actually up to date with its firmware, so I didn't face any issues there), but the CQ USB Audio Driver (v5.50.0) and the MixPad (v1.1.2) definitely helped. Download, install, setup.
Connect your mixer to your router and your computer. Now using MixPad is just an easy way to control your mixer from your computer so you don't have to run back&forth to adjust the settings. This way you can control the mixer on your computer. Very handy. I used an ethernet cable to connect the mixer to the router. I then used an USB B cable to connect the mixer to my laptop. After connecting the mixer to the router/network, you'll be able to get an IP address with which you can connect to the MixPad application. On your mixer, select CONFIG, then CONTROL&NETWORK, then NETWORK. Enabled Network should be 'Ethernet', IP Settings should be Automatic. Apply any changes, then use your automatically generated IP address to connect to the app on your computer. Now open the MixPad app on your computer. Select 'Other...' and click 'Connect'. Use the IP address and you should be good to go.
Start your DAW (Cubase in my case) and setup your mixer as the audio interface. Go to 'Studio' -> 'Studio Setup...' -> 'Audio System' and select your mixer's ASIO driver. Make sure your Output is connected as well. Go to 'Studio' -> 'Audio Connections...' and select your Outputs. For me it was by default the mixer's Channel 1 Out and Channel 2 Out for the L and R Stereo Out respectively.
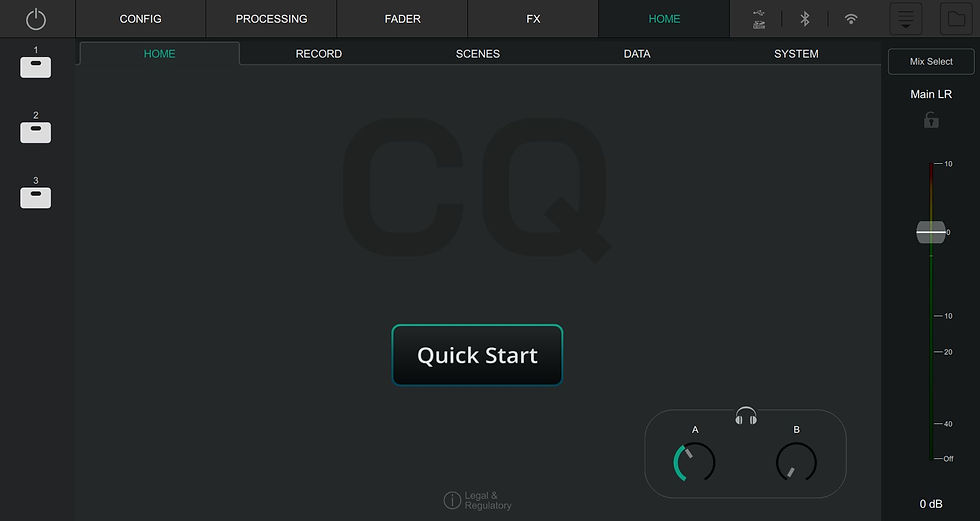
Now setup your mixer for recording and playback in the MixPad application For me I wanted to do everything from scratch so on the HOME menu in the app, I selected 'Quick Start', recalled a basic setup and went from there. I plugged my headphones into the 'A' headphone output on the mixer and turned up the volume. Now the most important things are: 1. you want to be able to hear your DAW output and 2. you want to be able to record music into your DAW through the mixer (and also be able to hear the raw input or the processed signal from your DAW). To hear your DAW stereo out channels through your mixer, go to your MixPad app, and select 'CONFIG' and then 'INPUTS'. As I've said before, the Stereo L and R are routed to Input1 and Input2 on the mixer. However, these are not Analogue sources, but USB sources, so make sure your Input1 and Input2 are configured accordingly. Now make sure these two faders are actually up at 0. To do this, go to 'FADER' and slide Ip1 and Ip2 up to 0. This gives you double mono, so make sure you're also panning them L and R using the PAN control. To be able to record, add a new track and select its input. I'm a guitarist so I added a new mono channel, and I used the 9th input channel (first in the bottom/second row of inputs on the mixer). In Cubase, when adding a new audio track you can select the 'Audio Input' and it should there (all 24 inputs should be there). Time to Gain up your input signal! In your MixPad app, go to 'CONFIG' -> 'INPUTS' and select your channel (9 for me). This time we're using analogue source (guitar cable) so Input Source should be 'Analogue'. On the right hand side there's a gain knob. Turn it up until you find it's gained properly. If you want to hear your DI signal from the mixer itself, turn up the fader on the input channel you're using (9 for me again). However, I usually don't want to listen to this. I use a lot of amp sims on my computer so I just turn it down and use the "monitor" function in Cubase to listen to the processed signal instead. But this comes in handy for vocals, acoustic instruments, etc. And by the way you should now be set up to record yourself!
SUMMARY The most important points: - Download the driver and MixPad app - Connect to router via ethernet cable and cour computer via USB B cable - Use automatic IP address to connect your mixer to the MixPad app - Setup your mixer as audio interface in your DAW - Select USB input source on the appropriate channels you're using as your DAW's Stereo Out L and R channels (default: 1 & 2) - Turn up the faders on these channels and pan them L & R - For recording: add new track, select audio input, then in the MixPad app select Input Source as 'Analogue', turn up the gain, and if you'd like to hear the raw signal, turn up the fader as well. I hope someone finds this and I could at least help someone. Feel free to message me for any further questions! Happy recording! P.S.: I'm still figuring out this blog stuff so please excuse these couple of images just yeeted at the end of the post. They are hard to add in the middle of paragraphs.


Comments